As the mom of two Turkish-American boys, I’m always on the lookout for ways to expose my kids to their Turkish heritage, especially the amazing arts and crafts. From miniature paintings to marbled paper, hand-woven kilims, carpets, ceramics and mosaics, Turkish artists have a long tradition of creating stunning art.
But living in rural Connecticut, we don’t often see real-life examples of arts and crafts from that part of the world.
So, when the winter holidays came around last December, I started thinking about how we could incorporate some traditional Turkish and Islamic patterns into our family’s holiday décor. That’s when I hit on the idea of making Turkish-inspired garlands using a mosaic pattern.
Worried a bit about the geometry? Don’t worry. Even math-phobic moms like me can do this!
Materials
Plain white paper—any size will do
Ruler
Pencil or pens
String or yarn
Push pins
Table or other flat, sturdy workspace
Thin foam board or recycled cardboard (thick enough to hold the push pins)—omit this it you’re okay with having little push pin dots in your table’s surface.
A fixed protractor is optional—for simplicity’s sake, we didn’t use one for our mosaics.
Time for a Little Art History
Way back when, before the protractor was invented, architects and designers used a piece of string to draft plans and templates. The artist would tie a string around a fixed point—a tree, for example. Then, holding the other end of the string taut in one hand, the artist would walk around the tree, inscribing a perfect circle as he walked.
Once the basic circle outline was set, the artist would use the center point of the circle and the string to divide the circle into halves, then quarters, eighths and so on.
I went for the purist approach with my kids and chose not to use a protractor. If your children don’t have the fine motor control to draw with the string, you can pre-draw the circles and mark the center in advance. Then follow steps 6 through 9 below.
Instructions for Making a Mosaic
1. Tie a piece of string to the head of a push pin. Tie the other end of the string to a pencil or crayon. We found six inches was a nice length to work with.
2. Lay the foam or cardboard down or even an old coloring book on the work surface. Place one sheet of paper on top.
3. Insert the push pin into the paper. Make sure it goes all the way through into the cardboard.
4. Have your child pull the string taut and then draw a circle. Note: you may need to help hold the push pin in place and/or help your child keep the string taut.
5. Remove the push pin and the string.
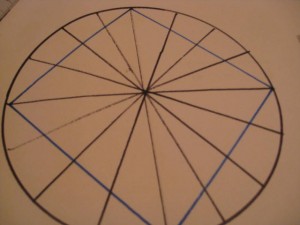
6. Help your child use a ruler to draw a straight line that divides the circle in half. This is a great time to sneak in some math-awareness questions like, “How can we find the middle of the circle?” or “How small of a slice can you make?” or “What does this shape remind you of? (i.e., a piece of pie, a pizza, a color wheel).
7. Continue using the ruler to divide the circle into increasingly smaller sections. Note: Consider the size of your circle when figuring out how many slices. You want to leave enough room for your child to experiment layering in colors and details onto the mosaic template. I find that it works best to limit yourself to four lines (which creates eight sections).
8. Help your child inscribe a square onto the circle. To do this, use the ruler to connect the ends of the lines at the point where they touch the circle’s edge. Again, here’s another opportunity to help your child work on pattern recognition and basic geometry concepts. Ask questions like these, “What shape did we just draw? How many squares can you find in the drawing? Are there any triangles?”
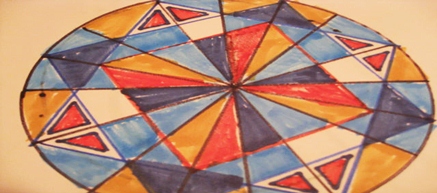
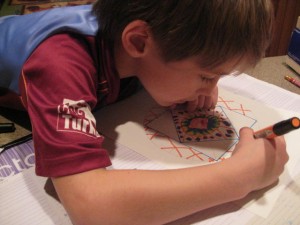
9. Invite your child to color in the different sections, using crayons, markers, chalk or colored pencils. You may choose to have them just enjoy the process, coloring willy-nilly. But, if you want to create a recognizable pattern, then you’ll need to give them prompts like, “Let’s color in all the triangles first. Which two colors do you want to use? Okay, let’s color one triangle orange, and then the next triangle will be blue. And we’ll keep switching like that.”
Now you’ve got your own Turkish mosaic to hang at home! If you make a couple and laminate them, they could serve as cool, new place mats for your table.


